Host a YSF Reflector on Debian Linux
A lot of guides follow the install on a raspberry pi. Today we will focus on installing a YSFReflector on Debian Linux. We will also cover installing the dashboard, and configuring PiStar to connect to your reflector, as well as registering your reflector online so others may join.
Creating Sudo User
First we need to create our super user. We do that by installing sudo as root, and adding our user to the sudoers file like so:su
nano /etc/sudoers
Add This line:username ALL=(ALL) ALL
Under:%sudo ALL=(ALL:ALL) ALL
Ctrl+x then Shift+y To saveexit
Install the YSF reflector Software:
sudo apt update
sudo apt install git
sudo apt-get install build-essentialgit clone https://github.com/n5amd/YSFReflector-debian-installer
cd YSFReflector-debian-installer
./YSFReflector-debian-installer
Input the name by typing two letters of your country, then a space, and then the name you’d like for your reflector.
So in the US, mine would be “US MODERNHAM”. Just keep in under 16 chars.
Then input your description, just keep it under 14 chars.
Once you’ve done that, you will enter your domain name if you have one. Otherwise, your public IP address which you can find here: https://whatismyipaddress.com/
Install Apache For the Dashboard
sudo apt-get install apache2
sudo groupadd www-data
sudo chown -R www-data:www-data /var/www/html
sudo chmod -R 775 /var/www/html
sudo apt install php libapache2-mod-php
sudo systemctl restart apache2
cd ~git clone https://github.com/dg9vh/YSFReflector-Dashboard.gitcp -R YSFReflector-Dashboard/* /var/www/html/
sudo rm /var/www/html/index.html
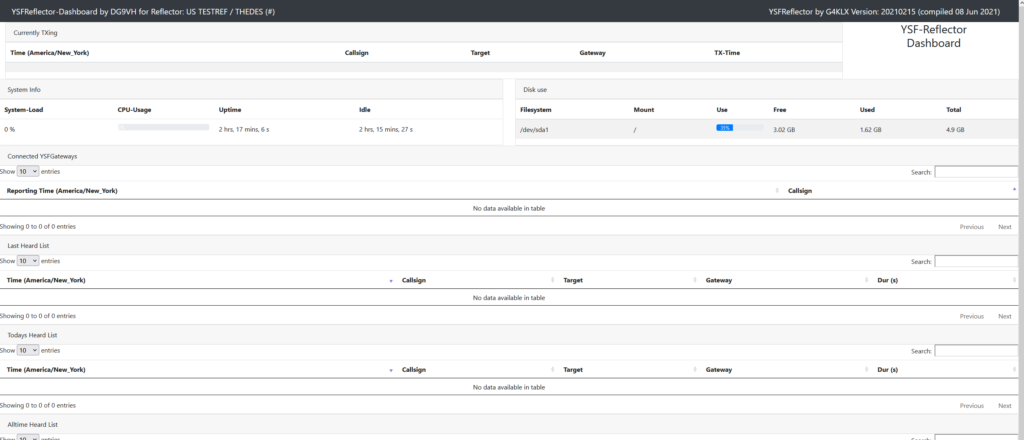
Once you’ve done that, you can navigate to your server and configure the dashboard.
Visit localserverip/setup.php in your browser.
Once you are here, you want to fill in the Path to the Logfile as default.
Leave the logfiel prefix as default.
The Path to YSFReflector.ini should be /ysfreflector/
The ini filename should be left as default.
And the path to the YSFreflector-executable will be the same as the path to the ini, /ysfreflector/.
Finish filling out the rest of the information on the bottom as you see fit and then click Save configuration.
Once saved we need to remove the setup.php so nobody can mess with your server:sudo rm /var/www/html/setup.php
Open your Ports
Now we will open ports on the server like so for the YSFreflector as well as the dashboard.sudo iptables -A INPUT -p tcp --dport 42000 -j ACCEPT
sudo iptables -A INPUT -p udp --dport 42000 -j ACCEPT
sudo iptables -A INPUT -p tcp --dport 80 -j ACCEPT
sudo iptables -A INPUT -p udp --dport 80 -j ACCEPT
You will also need to forward the ports on your router to your server ip, which you can see with the command:ip a
Register your reflector
Now we need to visit https://register.ysfreflector.de/register to register your ysf reflector. Put the information in to match your ini file. Then click Register. Activate it via the email link sent to you. You can then login with your email and the temporary password sent to you to manage your server. and thats it! After several hours – a day, you should see your reflector come up on your hotspot after an update.
[…] Today we are walking through the steps of setting up a YSFReflector on Debian Linux.We cover installation, running, and setting up the Dashboard Web Server.We then go into Registering your reflector online and connecting to it through pi-star.You can also use this reflector with the openspot, and openspot2.Blog Post with more detail on the install:https://themodernham.com/host-a-ysf-reflector-on-debian-linux/ […]
I was wondring if this install will work on DEbian 12. I keep getting an error after compiling the YSFReflector.
Error is: UH OH!! I dont see the YSFReflector application file after attempting to compile. The output above is the only indication as to why it might have failed. To Try again Remove ‘/root/reflector-install-files’.
I wold like to see if there is a work around as I’m not the best at commond line with linux. I can figure some things out but this one has me stumped.
Any direction would be appricated.
I have attempted to follow these steps with Debian 12 and 11. I keep getting an error message
Error is: UH OH!! I don’t see the YSFReflector application file after attempting to compile. The output above is the only indication as to why it might have failed. To Try again Remove ‘/root/reflector-install-files’.
What version of Debian or Ubuntu is this compatible with? And is there a way to make it work with Debian 12?
[…] few years ago, I was frustrated in my research for getting a YSF reflector up and running so I wrote this guide on getting a YSF Reflector running on Debian 10. Now here we are a few years later, and […]