
Convert an Old Computer PSU into a Ham Radio Power Supply
If you follow my YouTube, you know we like to save money. We’ve tried the $20 power supply I used on my HF radio here: https://youtu.be/0C6lu_oomn0, but now were going to try something a little different. Why not convert an old ATX PSU into a ham radio power supply? I’ll start off by saying this isn’t optimal, as computer PSUs can be quite noisy. But when your in a pinch, you may need to improvise, and this is a way to adapt and overcome.
Why this may be a bad Idea.
A computer power supply can be quite “noisy”, and is not really made for RF sensitive equipment such as a receiver/transmitter. Your radio may also need more current than the PSU can provide, but this could be the case with any of them. That’s why it’s important to check.
Considerations and Safety:
Any time you are dealing with power supply, you need to be careful and cautious. Power supply’s can hold charge after being unplugged for extended amount’s of time due to capacitors. Please take then into consideration when working and cutting wires.
CURRENT LIMITATIONS:
We also need to take into account the current limits of the power supply. Some may have an auto shutoff if you attempt to draw more than it can handle, some may just go up in flames. You can view the current limit in amperes, usually indicated somewhere on the supply. The one I’m using is rated for 15Amps, but my HF radio will draw 22. This means I need to turn the power down on the radio, and monitor it for heat.
What do you need?
- An ATX Computer Power supply Unit (I’ll be using an old one form the 2000’s)
- Some type of load of about 10 Ohms, than can handle 10W of power.
(I used one of these Cement Resistors): https://amzn.to/3s4jfuu - OPTIONAL: A LED, and 220 Ohm Resistor.
- OPTIONAL: Some type of Switch to turn the PSU on and off.
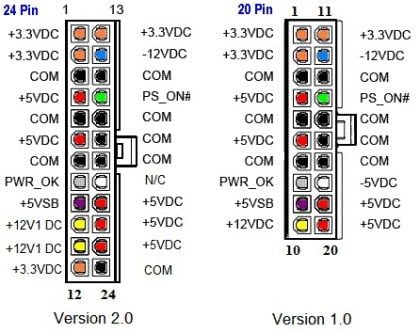
Understanding how a computer PSU works
Lets first by taking a look at this pin-out. Usually the connector form the PSU will come in one of two ways, a 10-pin or 12-pin layout.For this example, I’m using the 10-pin Adapter. What we want to pay attention to here is the green wire “PS_ON”, one of the yellow wires (+12V) , and one of the red wires(+5V) . If we want to enable an “on” indicator, we use the gray “PWR_OK” wire as well.
Enable the power Supply
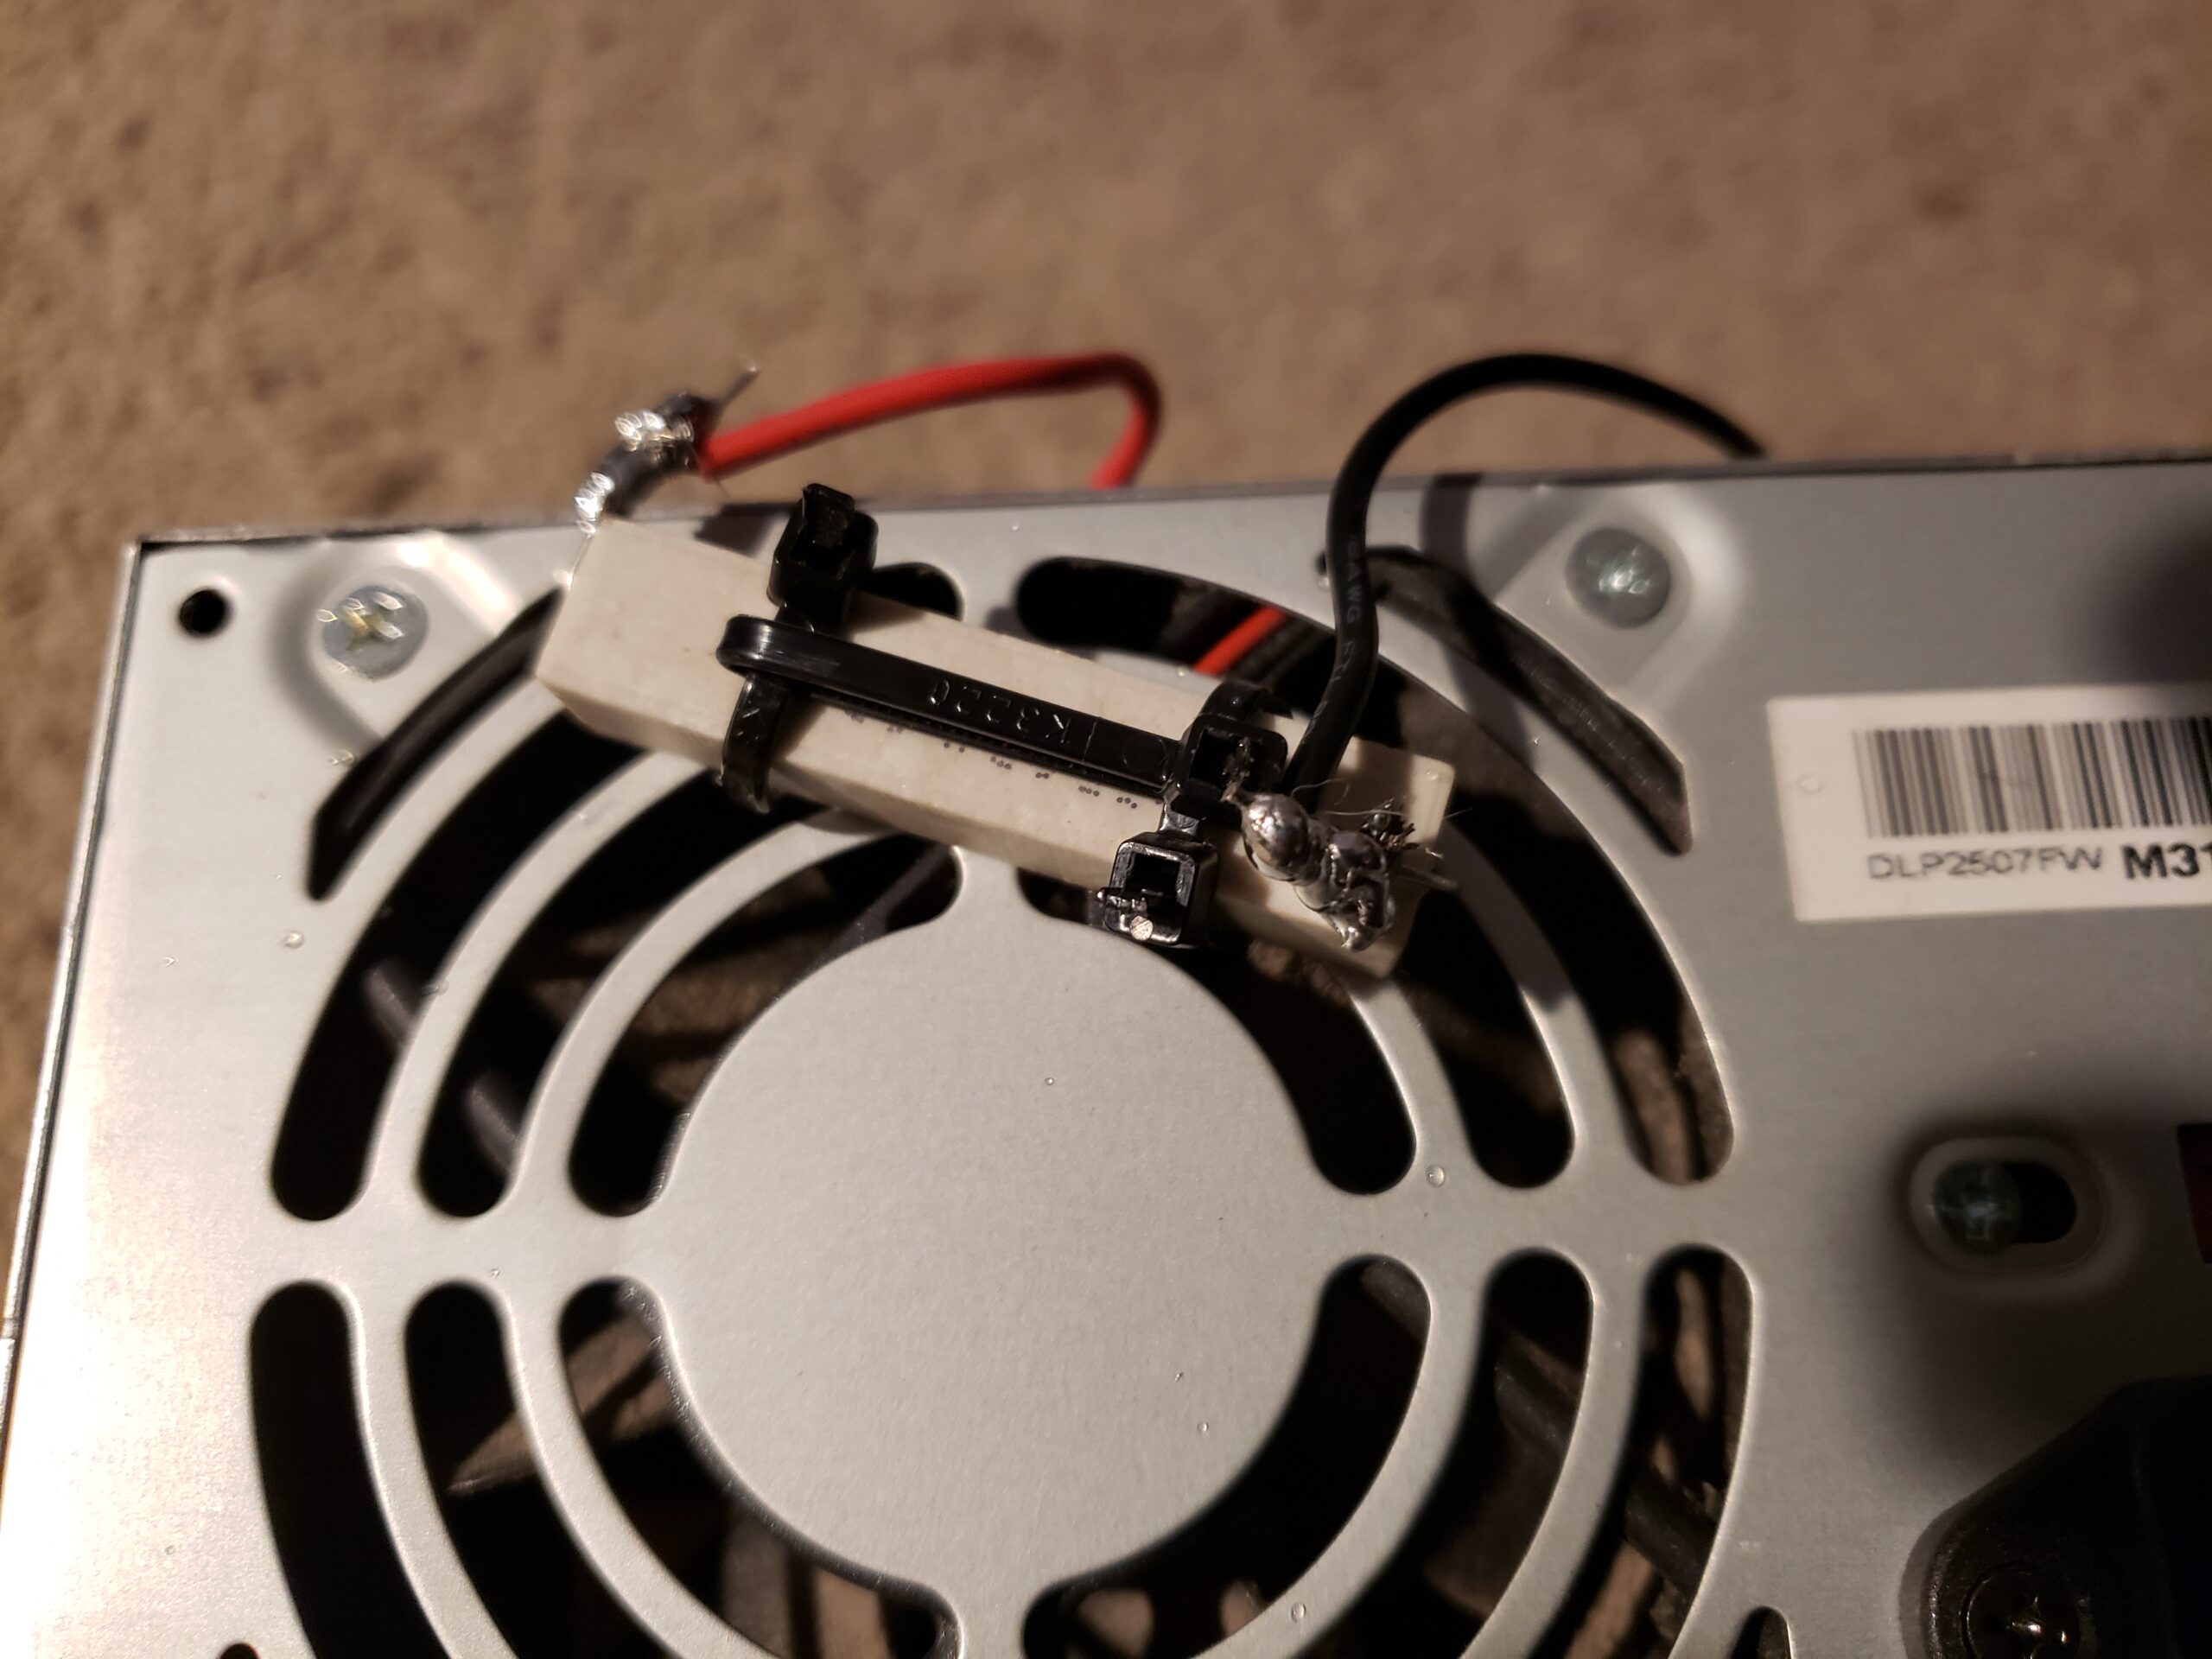
For most of these computer PSUs to “work” we need to add a decent load. This is where our 10W 10Ohm resistor comes into play. In our case, we are going to clip off one of these red wires, and one of the black wires (which are all ground). We then simply attach the red wire and black wires to each end of the resistor. I’ve put mine in front of the PSU fan to keep it cool, as I find it can get a little warm sometimes. This “tricks” the unit into thinking it is attached to a motherboard.
Turn On the Power Supply
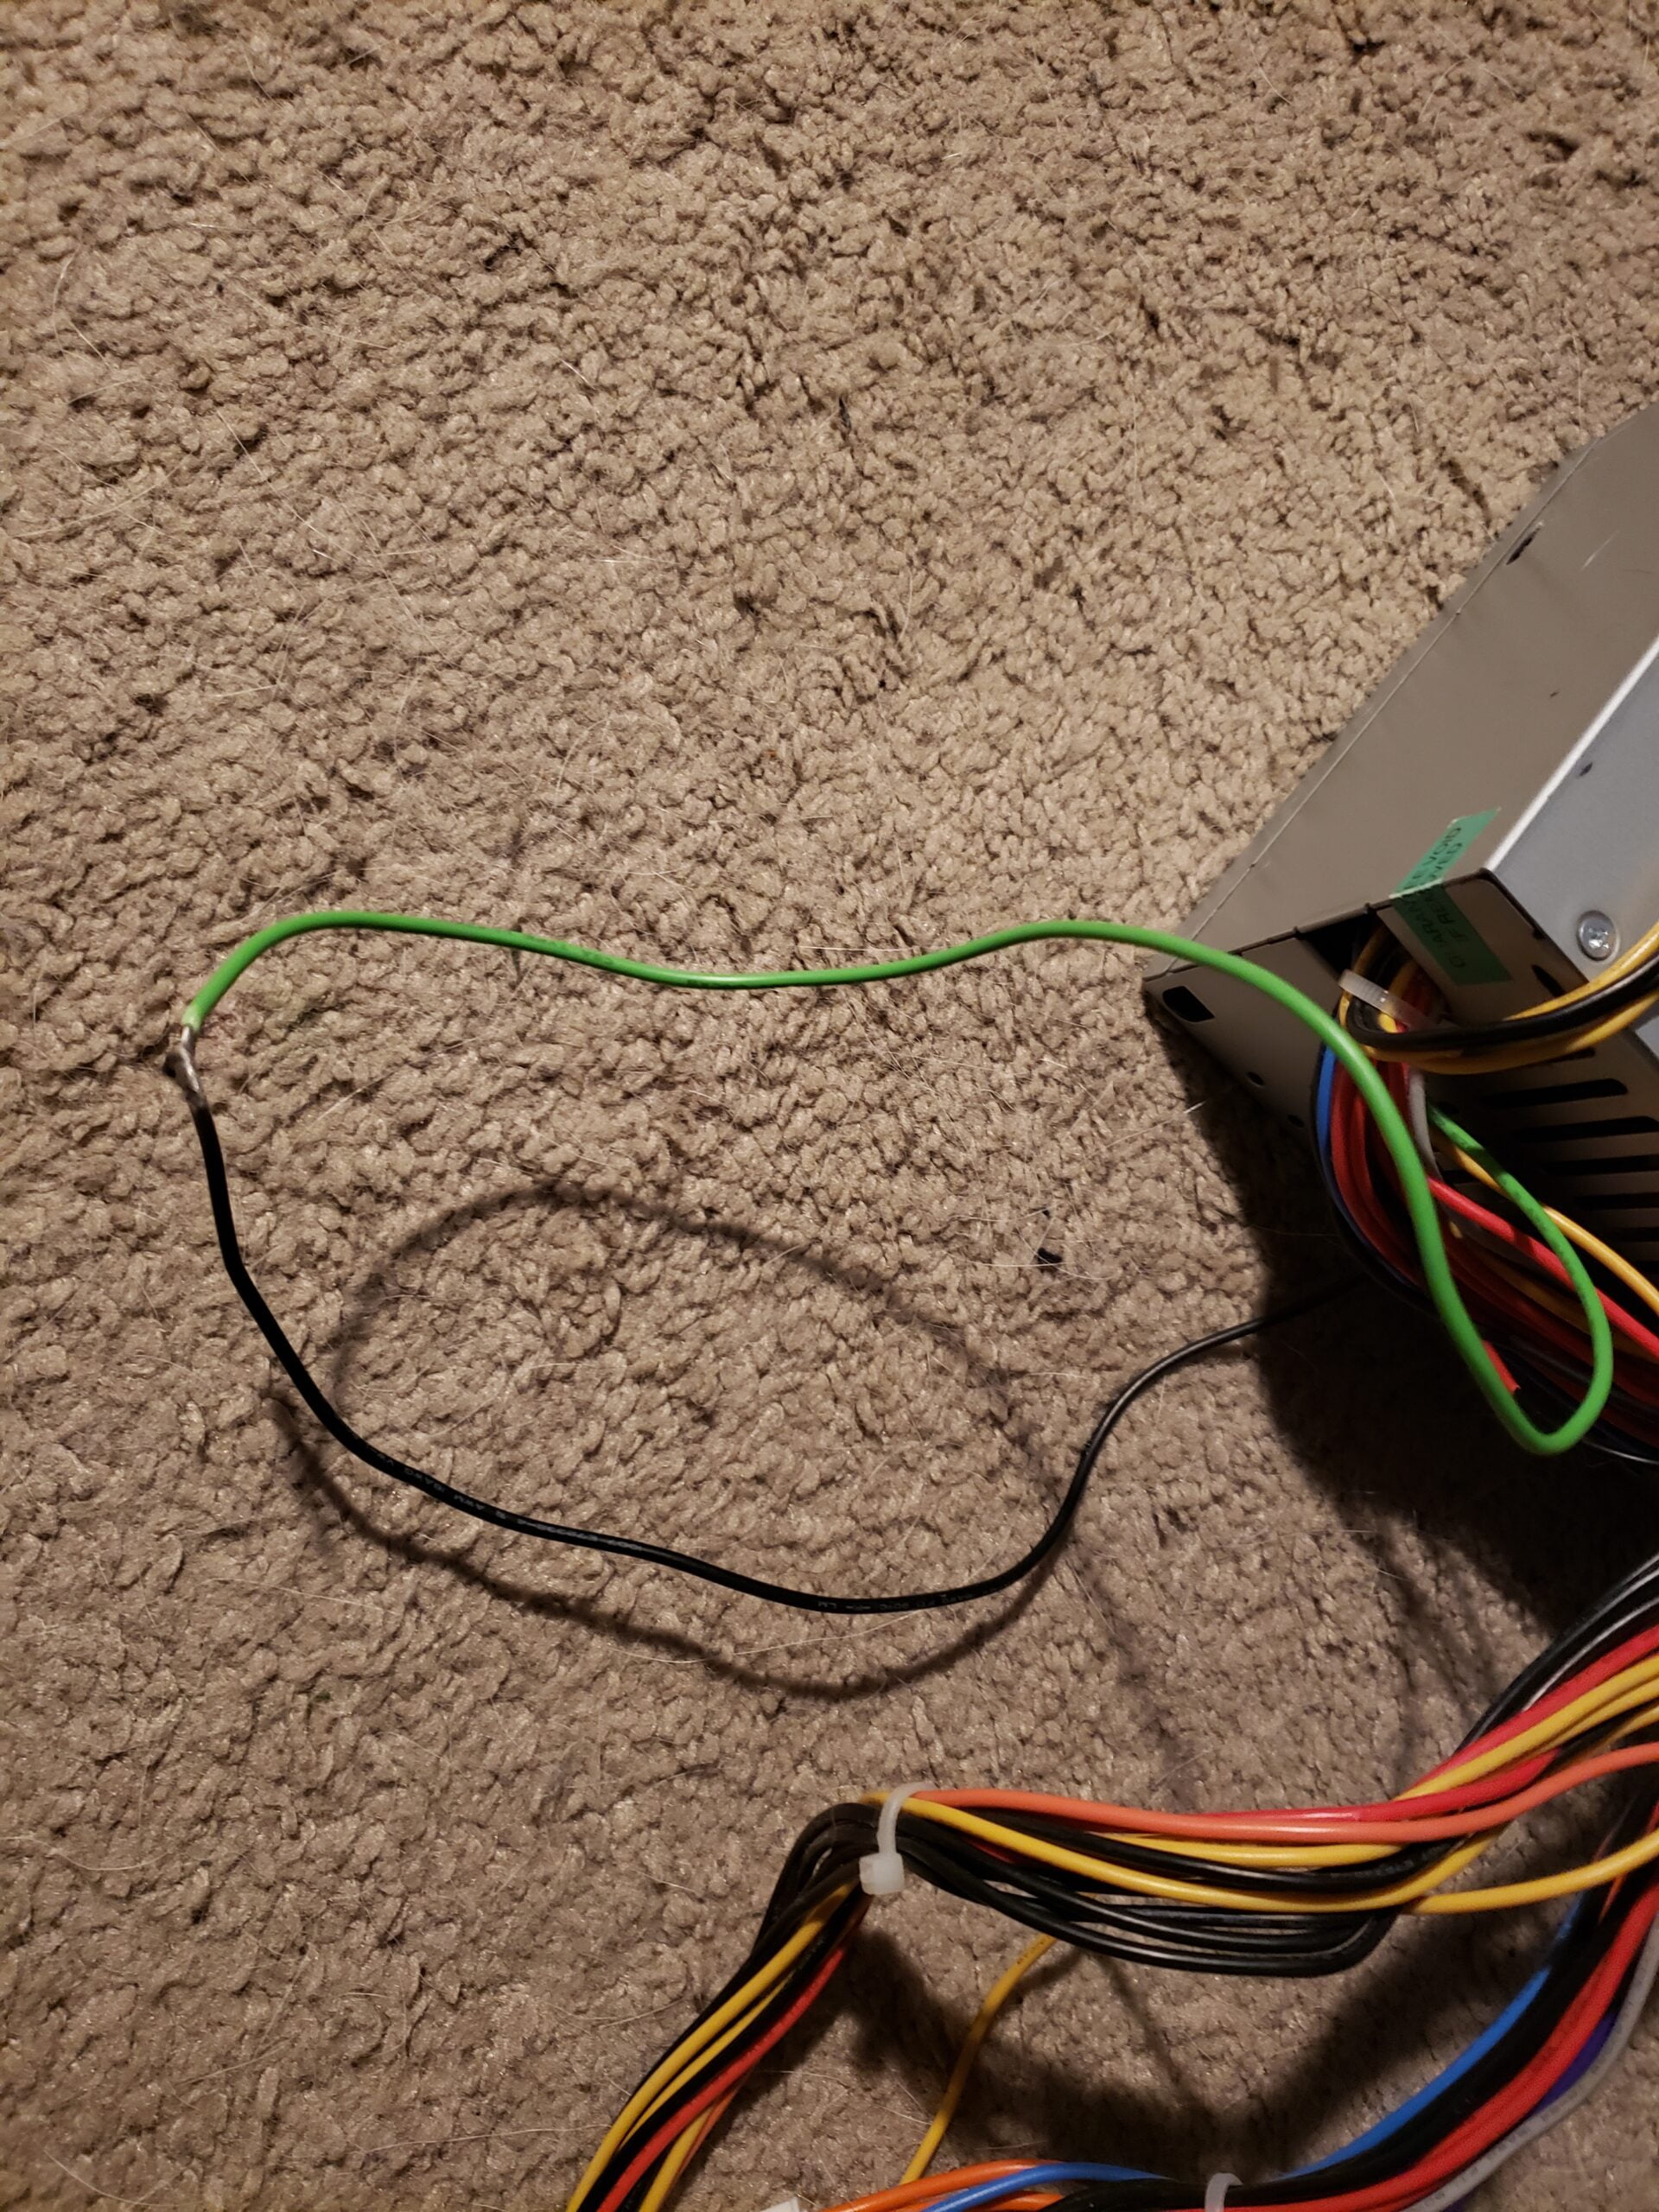
Next we need to turn the power supply on. This is where a switch of some kind would come in handy, although it is not required. To turn the power supply on, we short the green, and one black wire together. If you’d like to add a switch, we obviously just put it between those wires.
Optional: Add an On Indicator
To add an on indicator, we will utilize the PWR_OK, which is 5V when the power is well…okay. Because it is 5V, and we will use an LED, that means we need about 10-30ma. A 220 Ohm resistor in series will put us at about 22ma. This led will now only light when the power supply has a load, (Our resistor form before) and if the green and black wires are shorted together(our on/off) switch.
The finished product (with a little extras)
Connecting it to your radio
Before just connecting the power supply to an expensive radio, it’s a good idea to measure the voltage. For 12V we just need to use one yellow wire (+12) and one black (GND). Measure the voltage one a pair of these wires while the PSU is on. If you get 12-13.8, your should be ready to wire things up.
The rest is straight forward, yellow goes to your positive, and black to your negative. The thing you need to take into consideration is power draw. You don’t want to draw more current than your PSU is rated for. You can google your radios current needs, and you can find the PSUs rating on the box itself.
After this you’re good to go, you can also use red lines for 5V (Raspberry PIs, and most other USB devices), and the orange for 3.3V. You can even get a 24V line with a yellow(+12) and a blue(-12V), although this line is usually rated for much less current. And so now we have successfully converted our ATX Computer power supply into a ham radio power supply unit! Let me know in the comments how this worked for you, or share photos of your projects!
Unless you are very familiar with the current limitations for intermittent and continuous draw for a PC power supply, it’s probably a bad idea to attempt to use one to power a 100 watt transceiver, especially in 100% duty cycle modes (digital).
They can be a very useful bench power supply for constructions projects and experimentation. Here’s a good YouTube step by step instruction to do so.
https://www.google.com/search?q=dronabot+workshop+pc+power+supply&rlz=1C1CHZL_enUS738US738&oq=dronabot+workshop+pc+power+supply&gs_lcrp=EgZjaHJvbWUyBggAEEUYOTIICAEQABgWGB4yDQgCEAAYhgMYgAQYigUyDQgDEAAYhgMYgAQYigXSAQg4MDQyajBqN6gCCLACAQ&sourceid=chrome&ie=UTF-8#fpstate=ive&vld=cid:40b76089,vid:n_A-jkpjpcM,st:0
Much easier to use an ATX breakout board