Packet Radio Build Part 2 – Setup VARA, Dire Wolf, and Remote Desktop
Setting up Remote Desktop with NoMachine
In part one of this build, I had configured windows remote desktop so we can access our packet note remotely. Windows remote desktop protocol comes with a few issues when it comes to our packet node. Mainly, you will notice that the audio devices get disabled when we remote in. For a packet node, we don’t want anything screwing with our audio devices once they are configured, so I’ve opted in to using a program called NoMachine for our remote desktop solution. NoMachine is completely free, and can be used on an internal network with no need for internet.
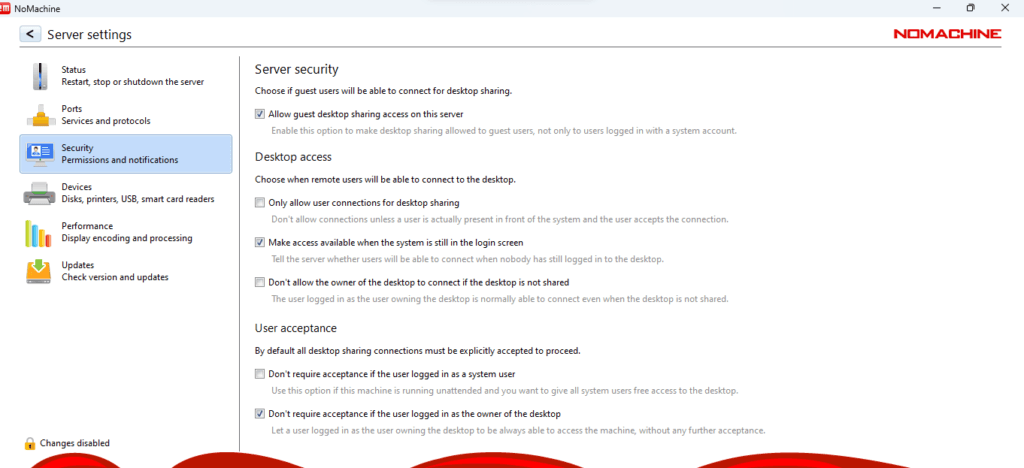
Download NoMachine from here on both your Packet Server, as well as the computer you will be accessing it from. Lets go ahead and open it up to enable a few options on the server. Right click the icon on the taskbar-> click show main window. Under the status tab, make sure start the server at system startup is enabled. Under the Security Tab, make sure “Make access available when computer is logon screen” is enabled. Just in case we get locked out, and auto logon stops working. Also check the boxes to not require user acceptance when logging in a s system user. This makes sure we can access the server when it is completely unattended.

After this, restart the server, and install the same application on the client. We should then be able to put the IP address of the server to connect to, and login with the user we created for windows.
Install DigiRig PTT, and other Digital Interface Drivers
Now we need to grab the drivers for our COM ports which will be used to interface with our radios. I will be using a DigiRig for my 2M radio, a FTM-6000R. I will be using the FT-891 for the HF side of things. This is where some thing may vary depending on your radio and soundcard/PTT interface, so I obviously can’t talk about every single one. If you’re using the digirig like I am, you can grab the COM port drivers for PTT here. Just extract the folder, right click the .inf file and click “Install”

The process is similar for my FT-891, but a little more involved considering it comes with CAT control. I’ll grab the drivers for the interface form the Yaesu website here. Either way, get your devices connected, and your drivers downloaded.
Splitting the COM Ports for Dire Wolf and VARA
The next hurdle we need to take care of is splitting our CAT/PTT COM interfaces so that VARA and Dire Wolf can use them both at the same time. I will be using a freeware application for this cause by HHD called Virtual Serial Port Tools downloaded from here. It’s free for non commercial use, and will allow us to split out PTT Port into two virtual ports so that VARA and Dire Wolf can share a single digirig. Once installed, open the Application and select the “Split Port” Button.

Now on the top portion, select the Physical COM port you would like to split. On the Bottom portion, click the “+” sign 2 or more times to add two Virtual ports we’ll use for our applications. Don’t try to change which virtual com port name to use, as this is a paid feature. Add more than two if you plan to run several instances of VARA or Dire Wolf for each radio. I will be running 2 VARA instances, and one Dire Wolf per radio, so I need 3.
Sound Card Renaming + Configuration
We will now rename our sound cards to something much more recognizable. Press your start button, and type “System Sounds”, and press the “Change System Sounds Option”. You will get a prompt that the audio service isn’t enabled if using Windows server. Select yes to enable it. From here, navigate to the Playback Tab, Right click your USB soundcard interface, click properties, and rename it for the given mode or radio. I like to also change the Icon.

Next, navigate to the “Levels” Tab, right click the slider, and change the measurement to decibels. Things are much more straight forward that way. Because there are so many different sound card interfaces, I can’t talk about them all. But most times, my interfaces like to sit at about -17.0 dB. Disable all the Enhancements in that tab while you’re here. Press Apply+Okay, and do any of the other Speaker Interfaces you plan to use for HF ETC. Next, navigate to the recording tab, and Change the name for your USB based microphone as well. You may also want to go to the “Custom” Tab and disable AGC.
Download and Install VARA
Grab the Vara HF and FM modems from here. And run the Installers for both. If you’re using windows server like I am, do not check the box to launch VARA at the end of the install. This will screw up the configuration file permissions, as you are running under the administrator account context. If you do this, you will need to uninstall vara and reinstall, or change the file permissions yourself.
Opening two or more instances of VARA
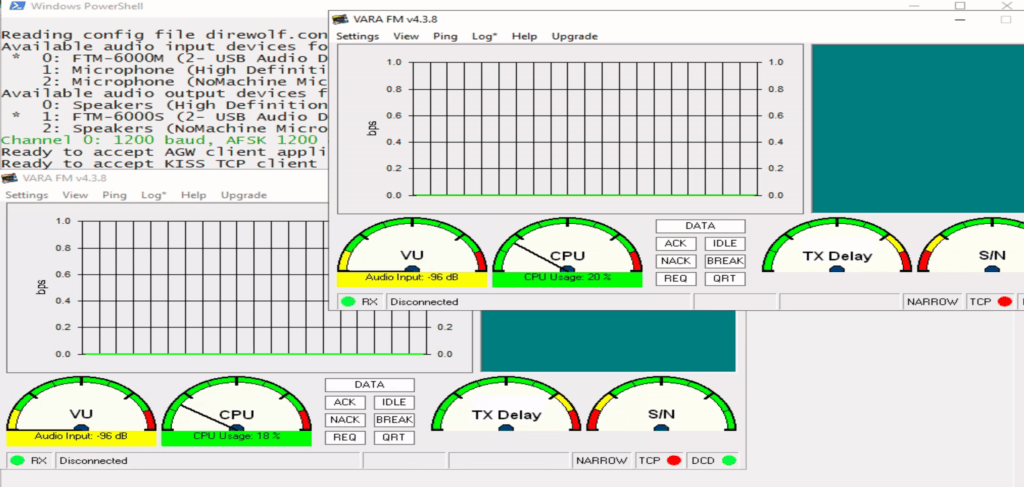
We will now Configure VARA in such a way that we can open up two instances for both FM, as well as two instances for HF. If you plan to only run an RMS Gateway, or only as a BBS modem, you won’t need to setup VARA this way. But I plan to link VARA with BBS software, as well as the RMS software, so this is necessary. Start by opening VARA FM or HF as you normally would, navigate to the Settings -> VARA Setup Window.

Add your License if you have one, and then close it out completely. Navigate to your C:\ folder, right click your VARA folder (VARA for HF or VARA FM or FM), and copy it. Then Right click, and paste it. You will now have Two of the same VARA or VARA FM folders. Rename them to something like “VARAFM1” and “VARAFM2”. This will break your shortcut, so keep that in mind, but we must do this to run two or more instances.
Open up the second VARA folder you’ve pasted, open the VARA.exe or VARAFM.exe executable, navigate to the Settings -> VARA Setup Once more, and this time change the command port to “8302” instead of 8301, and click close on that window. Now open the Settings -> PTT menu, and select one of the virtual COM ports we created earlier for your PTT.
Now back in your C:\ Drive, open the original VARA folder you copied, open the VARA executable, navigate to the Settings -> PTT tab, and select one of the other virtual COM ports we created earlier.
You now have two VARA instances running with the same PTT interface, using your dedicated Sound Card. Keep in mind that Once VARA instance is configured for ports 8300, 8301 for Command/Data, while the other is configured for ports 8302/8303 for Command/DATA. You can repeat this process for however many instances you need for each VARA modem (HF or FM).
Download and Install Dire Wolf.
Dire Wolf setup has been covered in great depth here. As such, I won’t be explaining the options in this post. I’ll grab the latest instance from here, and extract it onto my desktop. To keep things simple, although not necessary, I’ll copy this folder, and rename one “direwolf-fm”, and the other “direwolf-hf”.
Running two or more Instances of Dire Wolf
The setup for this configuration is mostly the same as the guide linked above. Although, because I’m running two instances, I will open each “direrwolf.conf” file and make sure that “AWGPORT” and “KISSPORT” are set differently in each folder. In my case, I’m simply change the direwolf.conf in my direwolf-hf folder to have “AGWPORT 8002” and “KISSPORT 8003” (Increased one from the default).
One other option you will need to change is to make sure the COM port is set to a virtual one created earlier to split the the physical interface. Because I already have two VARA instances open for my FM radio, I will use the third virtual serial port I dedicated earlier in my direwolf-2m configuration file. Because I’m using the digirig, this will be “PTT COMX RTS”. Again, I’m not covering dire wolf in depth here, but my 2M dire wolf configuration file looks like this:
CHANNEL 0
ADEVICE USB
MODEM 1200
PTT COM5 RTS
AGWPORT 8000
KISSPORT 8001
RETRY 5
FRACK 3
MAXFRAME 7
EMAXFRAME 63
PACLEN 128
DWAIT 0
TXDELAY 25
TXTAIL 15
I’ll cover the HF configuration I have for Dire Wolf in a later post.
Conclusion

Following up on the first post, where Windows server was configured for an Optimal Packet Node, this week we configured a proper remote desktop solution that wouldn’t interfere with sound cards. We also Learned to split our serial/com ports so that we can share one radio between several modems and applications. Last, we installed and configured VARA and Dire Wolf in a way that let us run several instances per radio. With all of this out of the way, next week we will look at configuring BPQ32 to tie into all of this so we can have our first Application. Although I’m already registered, we’ll also look at the process of request to become a Winlink SysOP to serve an RMS gateway.
[…] part two of the live packet radio series build, we set up VARA and Direwolf in such a way that they can share COM/PTT ports, as well as run […]