
How to Secure your Packet BBS / BPQ32 or LinBPQ Instance
After some security research in the packet radio BBS communities, I noticed a major lack of best security practices. I wrote a blog post on it here if your curious. I pointed out WHY things are problematic in the cybersecurity field, and gave a few pointers. This post is a follow up that I can share with others that shows how some of these problems can be mitigated, while still having use of your amateur radio packet BBS / BPQ32 or LinBPQ Instances.
Addressing Telnet
There’s no way around telnet at this point with BBS software. But if we MUST use it, we might as well set it up securely. There’s two points I want to address here. One is a configuration change for the TELNET port to restrict outbound telnet connection to SYSOPS only, and the other is using SSH for an encrypted tunnel, so that Usernames and Passwords don’t go through in clear text for everyone to see.
Disable Outbound Telnet Connections from your Node.
Open your bpq32.cfg configuration file, and locate your TELNET port. (You know, the one with the “DRIVER=Telnet” Line.) Under the “CONFIG” line, we will add “SECURETELNET=1“. Otherwise, if you have this port enabled, anyone can make outbound connections from your node. Telnet is flexible, so anyone can use this feature to perform port scans, and bruteforce logins from your network! See more about what this option does on the official docs here.
The result means your telnet port configuration will look something like this:
PORT
   PORTNUM=2
   ID=Telnet
   DRIVER=Telnet
   QUALITY=0
   CONFIG
   RELAYAPPL=BBS
   SECURETELNET=1
   LOGGING=1
   DisconnectOnClose=1
   TCPPORT=8010
   HTTPPORT=8012
   LOGINPROMPT=user:
   PASSWORDPROMPT=password:
   MAXSESSIONS=15
   CTEXT=Welcome to KN4MKB's Telnet Server\nEnter ? for list of commands\n\n
 USER=ModernHam,PASSWORD,KN4MKB,"",sysop
ENDPORT
Disable Anonymous Telnet user Access
Honestly, just remove USER=ANON,pass from your telnet configuration file. There is good no reason whatsoever you would want Anonymous users poking around your BBS, and maybe even every BBS you are linked with or can connect to. Would you want to give every single user access to your radio to transmit as they please?
Use a Username other than your Callsign for SYSOP
Every configuration file or example I’ve seen online has the SYSOP use the same username as their callsign. That goes without saying, such usernames are easily guessed. If we have the ability to make them different, do so for your admin user if nothing else.
Setup SSH Tunneling for Encrypted Telnet Communication for Linux BBS
Telnet is a clear text protocol. So unless you are okay with every single person between you and your node having SYSOP status and free use if your radio, you should avoid using it directly. There’s a few things you can to do mitigate this. One of those is creating a special user who can only be used for SSH Tunneling. We can use that user to forward the telnet port on the remote server through an ssh tunnel to our connecting client.
First create our dedicated user, I’ll call it “BBS” (Run the following as root)
useradd BBS -M -s /usr/sbin/nologinGive it a Secure password:
passwd BBSGreat, now we can use this user for secure telnet communication. On a connecting device, such as windows or Linux, we issue the following command to setup the encrypted telnet connection. Replace “8010” with your telnet servers port if it is different.
ssh -N -L 8010:YOUR_NODE_IP_OR_HOST:8010 BBS@YOUR_NODE_IP_OR_HOSTIf you did everything right, your terminal should hang there. You can see an example below:

You should now be able to open your favorite telnet client with the window above still open, and connect to localhost or 127.0.0.1 on port 8010 and gain access to your node.
telnet 127.0.0.1 8010With the above working, you can now close your telnet port, so that it is no longer exposed publicly, but instead lives behind your ssh tunnel.
/sbin/iptables -A INPUT -p tcp -i eth0 ! -s 127.0.0.1 --dport 8012 -j DROPAddressing HTTP
HTTP, like telnet is a clear text protocol. Anybody can see your usernames and passwords so long as they are connected to your network OR between yourself and your remote node. If you have a fully qualified domain name, we can put the HTTP server behind a reverse proxy to upgrade to HTTPS. If not, you can use SSH tunneling as we did with telnet to get the same results.
Encrypted HTTP with SSH Tunneling
If you needed to SYSOP login to a remote server, and do not have a Fully Qualified Domain Name for the next part, you can create a user as we did above for telnet, and use SSH Tunneling to login securely.
ssh -N -L 8012:YOUR_NODE_IP_OR_HOST:8012 BBS@YOUR_NODE_IP_OR_HOSTAfterwards, you simply open a web browser and navigate to http://127.0.0.1:8012 to access you nodes HTTP page over the SSH tunnel.
Upgrade to HTTPs with a Reverse Proxy
For this to work, you need a FQDN(Fully Qualified Domain Name) pointing to your nodes public IP address. I will show you an example for Debian/Ubuntu.
Install snap and certbot
sudo apt install snapd
sudo snap install core
sudo snap install --classic certbot
sudo ln -s /snap/bin/certbot /usr/bin/certbot
Install nginx
sudo apt install -y nginxRequest HTTPS Certificates for your Webserver
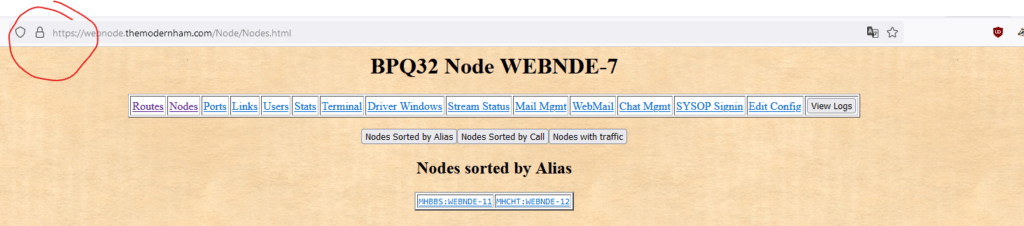
Replace “webnode.themodernham.com” with your own FQDN
sudo certbot certonly --webroot -w /var/www/html -d webnode.themodernham.comYou will be asked a few questions. Answer them, and you will obtain certificates at:/etc/letsencrypt/live/YOUR_FQDN/fullchain.pem
Create a new configuration file for nginx.
Replace “webnode.themodernham.com” with our only FQDN
sudo nano /etc/nginx/sites-available/webnode.themodernham.comPaste the following template in.
Be sure to change “webnode.themodernham.com” once more to your FQDN.
Change the “8012” port in the proxy_pass statement if yours is different in your bpq32.cfg file.
server {
    listen 80;
    server_name webnode.themodernham.com;
    return 301 https://$server_name$request_uri;
}

server {
        listen 443 ssl;
        listen [::]:443 ssl;
        server_name webnode.themodernham.com;
        ssl_certificate          /etc/letsencrypt/live/webnode.themodernham.com/fullchain.pem;
        ssl_certificate_key      /etc/letsencrypt/live/webnode.themodernham.com/privkey.pem;
        ssl_trusted_certificate  /etc/letsencrypt/live/webnode.themodernham.com/chain.pem;

       location / {
               proxy_set_header   X-Forwarded-For $remote_addr;
               proxy_set_header   Host $http_host;
               proxy_pass         http://127.0.0.1:8012;
       }

}
Press Ctrl+X then Shift+Y to save the file.
Next Apply the configuration.
Again, be sure to replace webnode.themodernham.com with your own FQDN in both places in the command.
Choose Option #1 on the second command when prompted.
sudo ln -s /etc/nginx/sites-available/webnode.themodernham.com /etc/nginx/sites-enabled/webnode.t
hemodernham.com

sudo certbot --nginx  -d webnode.themodernham.com

sudo service nginx reload
You should now be able to navigate to http://yournode.com with a secure connection!
You can now close the exposed HTTP port with the following command, as now it’s only accessed via the reverse proxy:
/sbin/iptables -A INPUT -p tcp -i eth0 ! -s 127.0.0.1 --dport 8010 -j DROPMore Important Points
The following are configuration options that lead to unintended access to your node.
Remove AUTOADDMAP
Lets start with the AUTOADDMAP statement that many people have. This statement is located within the AX25 port configuration, and seems to be included in many default configuration options. This statement itself just adds a route to ANY node that sends you a UDP packet broadcast with a CALL/SSID. This effectively means, that by having this is an option, you are giving anyone that can reach your server permission to connect to your node. Be it ham, spam, or any other weirdo. The correct option here is to manually map every station you would like to form Node to Node links with. I would’t want anyone on a network I’m connected to with this statement, as they are effectively giving the entire world access to any node they are connected to.
Remove Sensitive Information Before Sharing Configs.
The BPQ32 groups page is full of people sharing their configuration files to aid in troubleshooting. MOST of these files contain sensitive information that wasn’t required for the help needed. When you share config files online, you should remove the data that can make your an easy target for an opportunistic hacker. Do not include port numbers, usernames, and passwords. For BBS software, you should also remove your map statements. These include domain names and IP’s telling others where other nodes can be found. This wouldn’t be a problem if users didn’t allow anonymous access, include AUTOADDMAP statements, and updated their servers every few months or so. But this isn’t the case.
Callsign Whitelist
You can also implement a callsign whitelist on your BPQAXIP port that will only allow specific callsigns to connect via that port. This can be done with VALIDCALLS=CALL1,CALL2,CALL3 right above the CONFIG portion.
Do you really need NODE=1?
NODE=1 ships with the default configuration. The node option is what determines if other users can use your node to connect to others. If this is not something you need, simply set it to 0 to minimize the chance of someone bouncing off your node in the event the network is compromised by an AUTOADDMAP statement. If you do set it to 0, it means others can still use your applications.
Ban Bad Actors
Look into software like crowdsec, which is a free software that will scan your logs and block attackers via firewall. When exposed to the web, thousands of bots and criminals scan and brute force all open ports 24/7. Not only can installing software like crowdsec make you safer, it can reduce the workload of your server, which needs to process these requests. If you aren’t to keen on a full system like crowdsec, at the very last check out fail2ban, which will block excessive bad login attempts. It can even be made to work with Linbpq/bpq32’s telnet instance.
Stay Up to Date
Of all things, check for an update every so often. Linbpq ships as a single binary that needs replaced. The windows exe is a simple installer. The map over at http://nodemap.g8bpq.net:81/ basically tells on everyone. There’s absolutely no reason your node should be running software 4+ years old for a project still being maintained, yet roughly half of the nodes on this map are. Updates bring important security fixes, and BPQ is no exception.
Conclusion
I hope the tips above can help those concerned about cyber security better secure their BBS nodes. I’m really enjoying my dive into packet radio. I want to link with others, but the cyber threat posed is very real. After talking with the community, I think there is just a lack of awareness. Hopefully someoen will find this useful.
Thanks for your work on this. I went in and tweaked the config file I was working with. Also figured out how to update Linbpq to the latest version.
73
Kq4cin
Glad you could find it helpful!
>Setup SSH Tunneling for Encrypted Telnet Communication for Linux BBS
Here (local to me) nobody is allowed to use encryption on amateur radio bands, thought that applied world-wide…?
The best way to prevent your SYSOP password from being taken would be OTPs. Either HOTP or the more popular TOTP.